1. Customize your Account Setting
In order to receive Smart Alerts via email or text, you’ll need to set up your Contact Methods. Click your user name in the top right and select “Account Settings” from the drop menu.
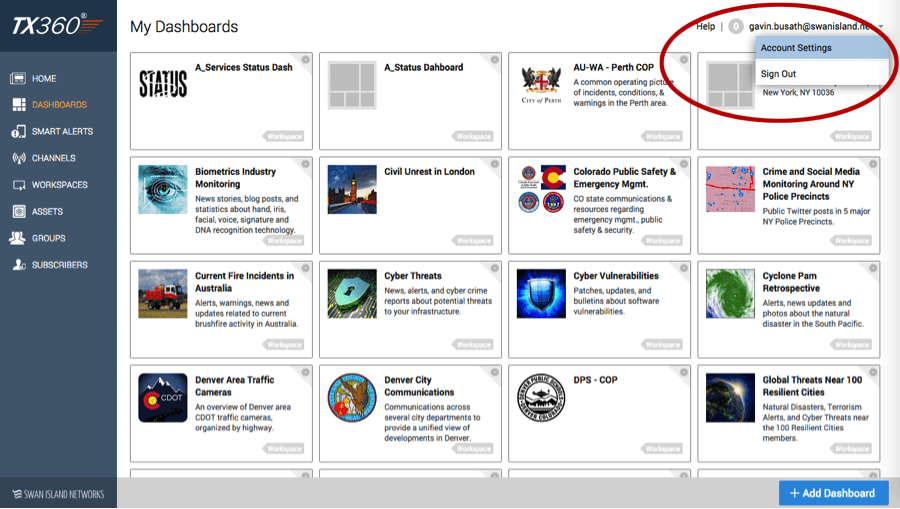
Once on the Account Settings page, click “Add Address” to enter email addresses and phone numbers and assigning them to various urgency levels. You can also change your time zone, password, and profile image (which will be displayed on the Workspace timeline).
2. Create Channels that you will copy Alerts into
The diagram below illustrates one way to set up an effective curating flow in TX360:
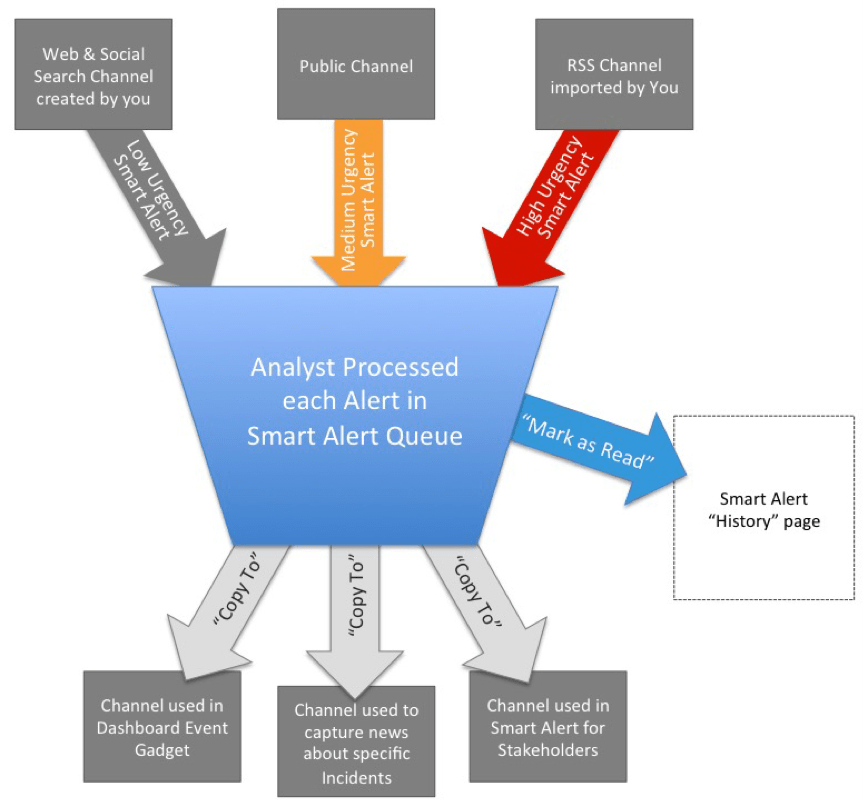
You’ll want to determine which use cases apply to your team and create empty Channels for each use case:
- Curating Alerts that display in a Dashboard gadget
- Gathering Alerts for a specific Incident
- Curating Alerts to be sent to other stakeholders
- Other?
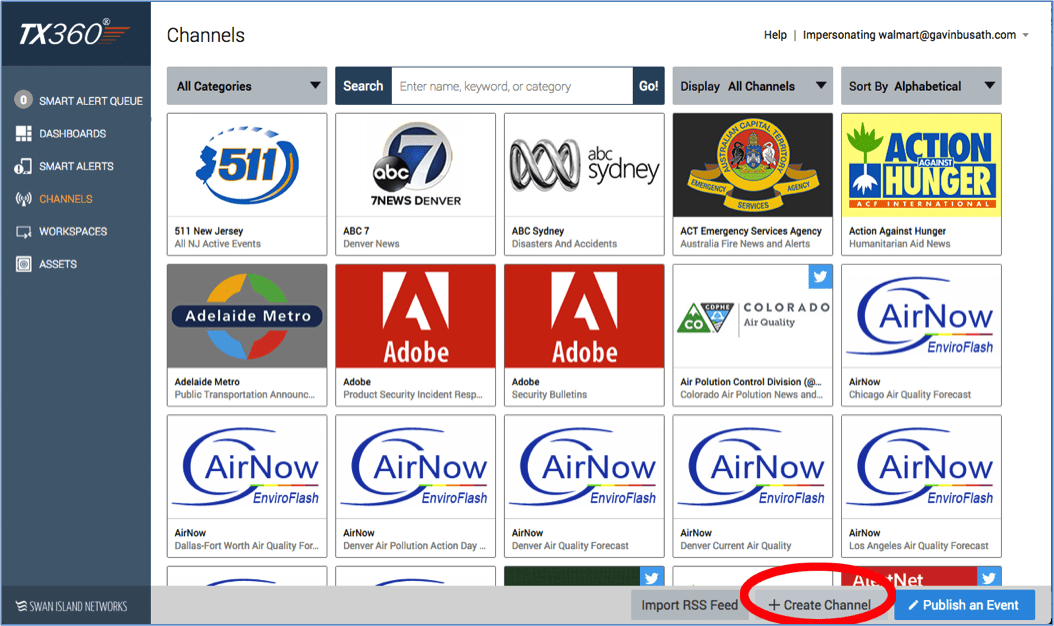
- Click “+ Create Channel” to start the Channel creation flow.
- Skip to “Step 5. Name Channel” tab and enter a Source Name, Content Title, Description, and Channel card image.
- Click the blue “Save Channel” button in the bottom right.
3. Create Smart Alerts

- On the “Smart Alerts” page, click the blue “Create Smart Alert” button in the bottom right.
- On the first tab (“1. Select Channels”):
- Use the Category filters, Search bar, Gallery filters (where you can find the empty Channels you just made in “Created By Me”), and sorting options to narrow down your selection.
- Click on a Channel card to view its recent alerts.
- Select the channels you’d like to monitor by clicking their “Select” buttons.
- On the second tab (“2. Filter Events”):
- View and remove selected channels in the table at the top
- Add keyword, location, attribute, and Asset proximity filters to hone in on alerts you’d be interested in.
- View the filtered results in a list or on a map (click on the alert to view its details in-line) to the right. Note: these results will not be added to your queue, they’re just displayed to help guide your filtering effort.
- On the third tab (“3. Select Recipients”):
- Name the Smart Alert—this will display in the Smart Alert history table
- Designate the Urgency level—this will determine 1) the color of the Smart Alert in the queue (High Urgency alerts will be red, Medium will be orange, and Low will be gray) and 2) which contact method the alert will be sent to (text or email), if enabled.
- Select Smart Alert recipients—You’ll want to select “Myself” and the “Only display alerts in Smart Alert Queue; do not send to contact address” to start. This will allow you to fine tune your filtering and curating before receiving alerts via email or text.
- Click the blue “Save Smart Alert” button in the bottom right and confirm Smart Alert enablement.
4. Curate Smart Alerts in the Smart Alert Queue
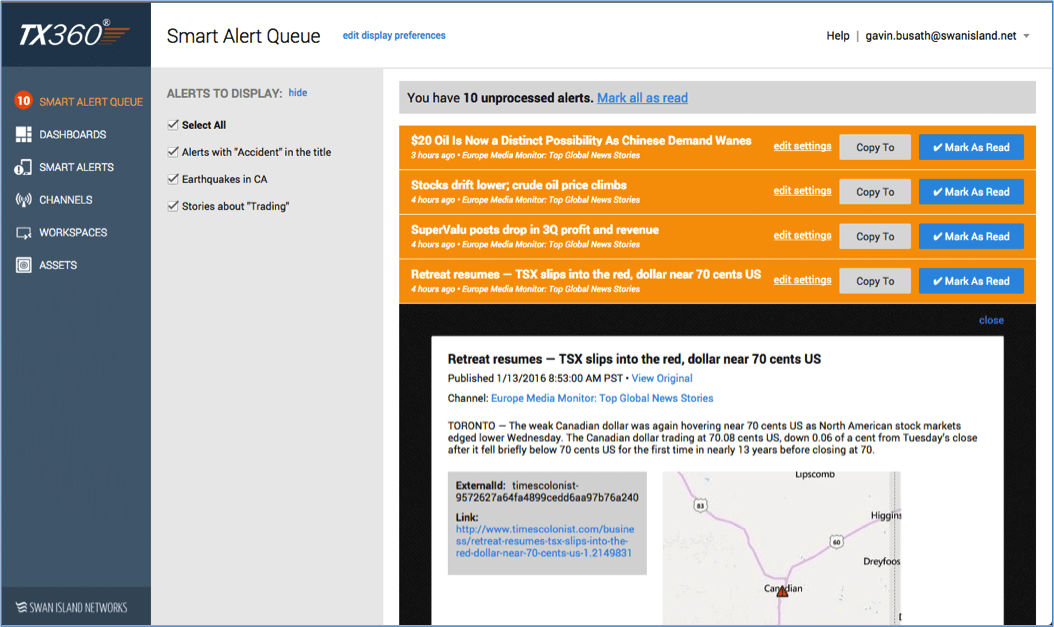
- On the “Smart Alert Queue” page, you can process Alerts from each of your Smart Alerts:
- Click the “Copy To” button to copy the Alert into one or more of your empty Channels, and it will be instantly visible wherever that Channel is being used.
- Click the blue “Mark as Read” button to dismiss an alert from the queue. Note: It can always be viewed and copied from the Smart Alert history page—just click the clock icon next to the Smart Alert in the Smart Alerts page.
- Adjust a Smart Alerts’ settings by clicking the “edit settings” link.
- Toggle the visibility of each Smart Alerts in the gray sidebar.
- Click the “Mark all as read” link in the gray bar at the top to dismiss all alerts in your queue (visible or hidden).